Madison CS 3-4: Roguelike
This project is going to be kind of an experiment! We’re going to give you some starter code for a terminal-based game, and we’ll give you some ideas about features you could add to it, and we’re going to see what happens.
This assignment doesn’t have quite as many rules as we’ve had in previous projects - the goal is for you to come up with some fun features and add them to your game!
What’s A Roguelike?
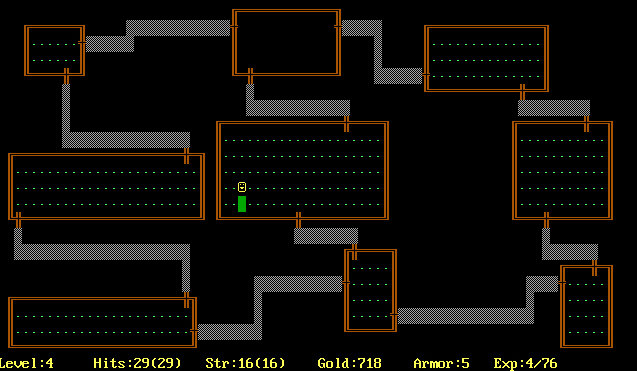
In the old days, there was a game called Rogue. It looked like this:

The player’s character is the little yellow smiley face. Wikipedia says:
In Rogue, players control a character as they explore several levels of a dungeon as they seek the Amulet of Yendor located in the dungeon’s lowest level. The player-character must fend off an array of monsters that roam the dungeons. Along the way, they can collect treasures that can help them offensively or defensively, such as weapons, armor, potions, scrolls, and other magical items. Rogue is turn-based taking place on a square grid represented in ASCII.
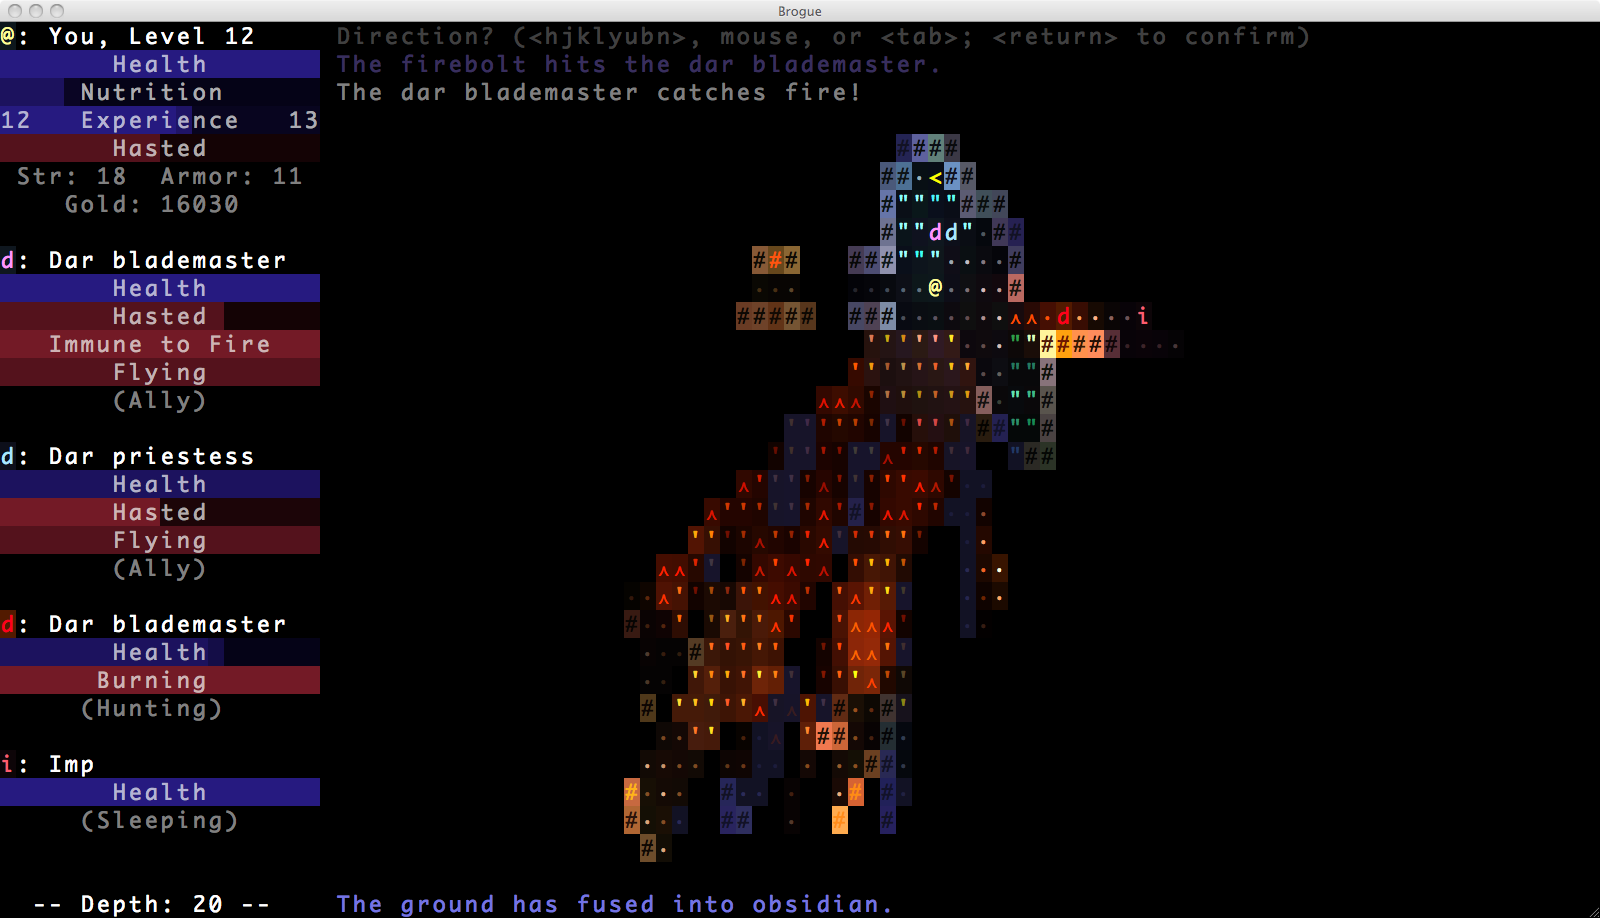
A lot of the ideas originally found in Rogue have since spread to tons of other video games, and we call those games roguelikes. Here’s one called Brogue:

Here’s a super cool one called Cogmind:
In this project, you’ll be building a roguelike of your very own.
What We Give You
This project comes with code for an extremely basic game. It looks like this:
You’re the @ sign, you can move around, you can’t go through walls, and you can quit the game when you get bored.
Getting Started
We’ll be working on this project in repl.it!
The starter code for this project is available in our repl.it Python - Unit 6 - Dictionaries classroom in the Projects section.
Reading The Code
The starter code comes with three files:
1: level.txt
A simple text file that looks like this. It’s the level! If you want the game’s level to look differently, you can go ahead and edit level.txt. A '#' is a wall, a ' ' is an empty space, and a '@' is the player’s starting position.
2: roguelib.py
A Python file that contains some useful functions that can be combined together in order to make a simple roguelike game. Go ahead and read through this file - you don’t have fully read and understand every single line of code right now before you’ve started working on the project, but it’d be a good idea to look through the file and see what functions it defines and what their docstrings say the functions do.
You’ll have to make changes to some of these functions when you add new features to the game!
3: main.py
A small Python file that combines the functions from roguelib.py together into a simple game loop. Read the game loop and convince yourself that you understand how it works. Refer back to the code in roguelib.py whenever main.py uses a function that don’t fully understand.
Feel free to add more code to this file. You can also create more files if you want, it’s a useful thing to do as your project gets bigger.
As a general rule of thumb: it’s hard to read and understand a big complicated file with 1000 lines of code in it and a vague name like program.py; it’s much easier to read and understand several smaller files, each of which has 150-200 lines of code and a good clear name like ai.py or physics.py or quest.py.
Seriously, Read Those Files
This is what programming in real life is like. It’s almost never the case that you’re starting a new program completely from scratch - you’ll almost always be working on a (probably really big!) program that someone else wrote years ago, or that you wrote a few weeks ago but it’s been long enough that now you don’t really remember what all the code does.
This is what you do: you read through the preexisting code, convince yourself that you understand what it does and how it fits together, and then, once you’re familiar with the codebase, you can start making changes and adding features.
The Goal
The point of this project is for you to come up with some cool features and then build them. Here are some ideas:
- Monsters that just sit there and don’t do anything
- A goal space (if the player makes it to this space, they’ve beaten the game!)
- A combat system (when you bump into a monster, you fight it!)
- XP / leveling up / stats
- Monster AI (monsters follow you around!)
- A combat log that says stuff like “you strike the skeleton for 3 damage!”
- A dog that you can pet
- Items / power-ups
- Doors / traps
- Spells / ranged combat
- Puzzles
- Quests
- Randomly generated levels
That’s just some stuff off the top of my head. If you come up with an idea you like better, you can do that instead!
Adding A Goal Space
For starters, let’s add a simple feature to the game: a goal space. We’ll add a ! to the level, and if the player reaches it then we’ll tell them good job and end the game. It’ll look like this:
Here are the things I did in order to add that feature to the game:
- Added a
!tolevel.txt. - Updated
load_level()to look for a!inlevel.txtand save its(x, y)position in the game dictionary so that later we can check to see if the player has reached the goal space. - Updated
draw_game()so that it prints out a!where the goal space is. - Updated
run_game()ingame.pyto print out a message and end the game when the player reaches the goal space.
Once I had done all of those things, I had a working goal space feature! Notice that this involved messing around with a lot of the code in roguelib.py - you’ll have to do this too when you add your own features. It’s going to involve reading code and figuring out what it does and figuring out what you want to do and where you should make your changes. This is what programming is like! :)
Here’s the code I wrote to make that happen. This file is a “diff”, which stands for “the difference between an old version of a program and a new version of that program” - red lines are old lines that I removed, green lines are new lines that I added.
You’ll notice that I included a couple of assert statements in load_level(). You don’t have to do that when you add a feature, I just did it for this particular feature because I wanted the program to loudly complain if someone either a) forgot to add a goal space or b) tried to add two goal spaces even though this code only supports tracking the (x, y) position of a single goal space.
You might read that and think: but what if I want to add a feature that can happen on more than one space at a time? Well, check this out:
Implementing Dumb Monsters
Here’s a feature that adds dumb goblins to the level. They just sit there and don’t do anything, and the player can’t move into a space if it has a goblin in it. Here’s what that looks like:
Here are the things I did in order to add that feature to the game:
- Added a couple of
gs tolevel.txt. - Updated
load_level()to look for'g's inlevel.txt; every time we find a'g'we make a goblin dictionary, add that dictionary to a list, and include that list in the returned “game dictionary”. - Updated
draw_game()so that it prints out agon spaces that have a goblin in them. - Updated
move()so that it doesn’t allow the player to move into a space that has a goblin in it.
Here’s the code I wrote to make that happen. It’s another diff - green lines are lines I added, red lines are lines I removed.
Notice that this feature is more complicated than the goal space feature was. Because there can be multiple goblins in the level, I had to keep track of them in a list. Look at the code in load_level() that constructs that list and saves it in the game dictionary. Look at the code in draw_game() that looks through that list to see if the space that’s being printed out has a goblin in it. Look at the code in move() that looks through that list to see if the space that the player’s trying to move into has a goblin in it.
Notice That There’s A Pattern Here
I followed these steps when implementing both of those features:
- Pick a character that hasn’t been used for some other feature already, like
☃ - Add that character to
level.txtone or more times - Update
load_level()to look for that character and save its position in the game dictionary - Update
draw_game()to print that character out in the right place so that the player can see this new thing you added to the game - Add some more code that makes this feature actually do something. For the goal space I added code that ends the game if the player reaches the goal space; for monsters, I added code that prevents the player from moving into a space that has a monster in it.
Steps 1 through 4 were the same both times, but step 5 was different for each feature.
Submitting your project
Copy the link at the top of your repl (it will look something like https://repl.it/@tomalley/roguelike) and turn in the link on Google Classroom.
Assorted Notes
I’ve written a couple of really neat articles on how to generate simple random levels using a couple of different algorithms:
Here’s a list of some of my favorite roguelikes (in no particular order):
- Risk of Rain
- FTL
- Dead Cells
- Slay the Spire
- Isaac
- Spelunky
- Teleglitch
- Crypt of the Necrodancer
- Cogmind
- Caves of Qud